
Have you ever wanted to make sugar cookies in a specific shape, but don’t want to buy a custom cookie cutter shape that you’ll only use one time? Or perhaps you want to flex your creative muscles and create something that you’ve never seen before? Here’s a quick tutorial on using common kitchen materials to create a custom cookie cutter shape.
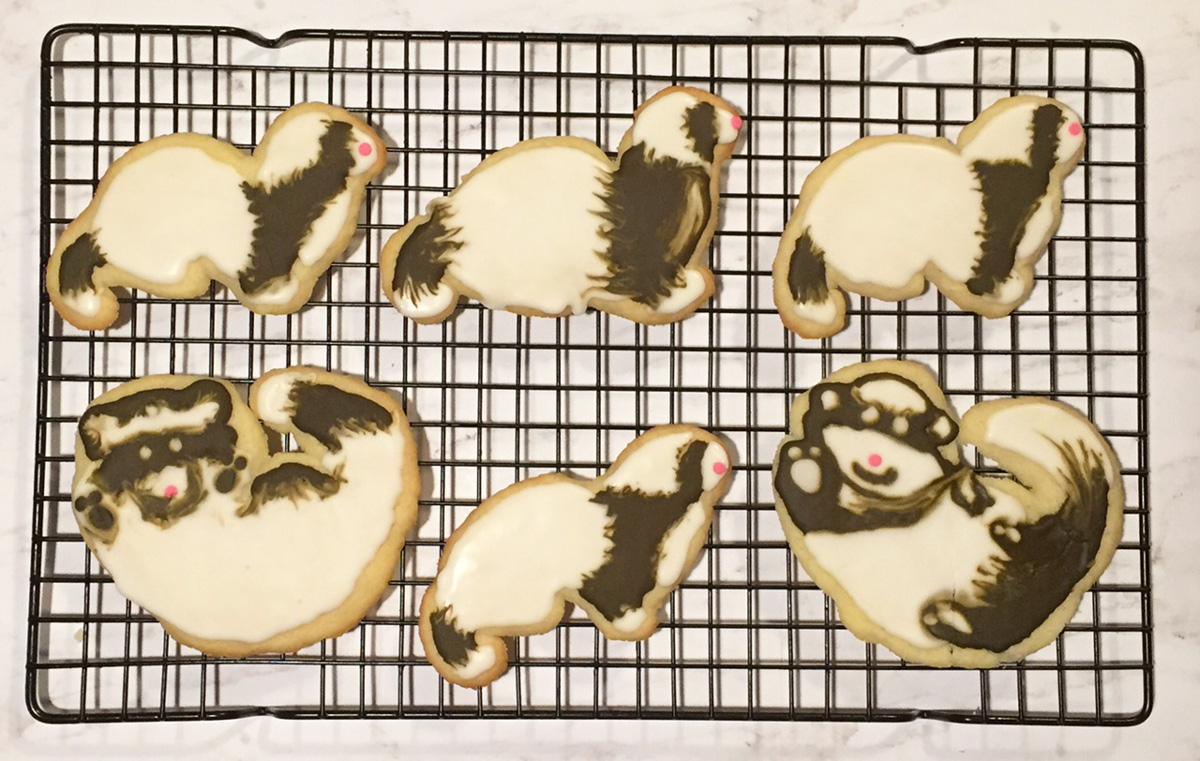
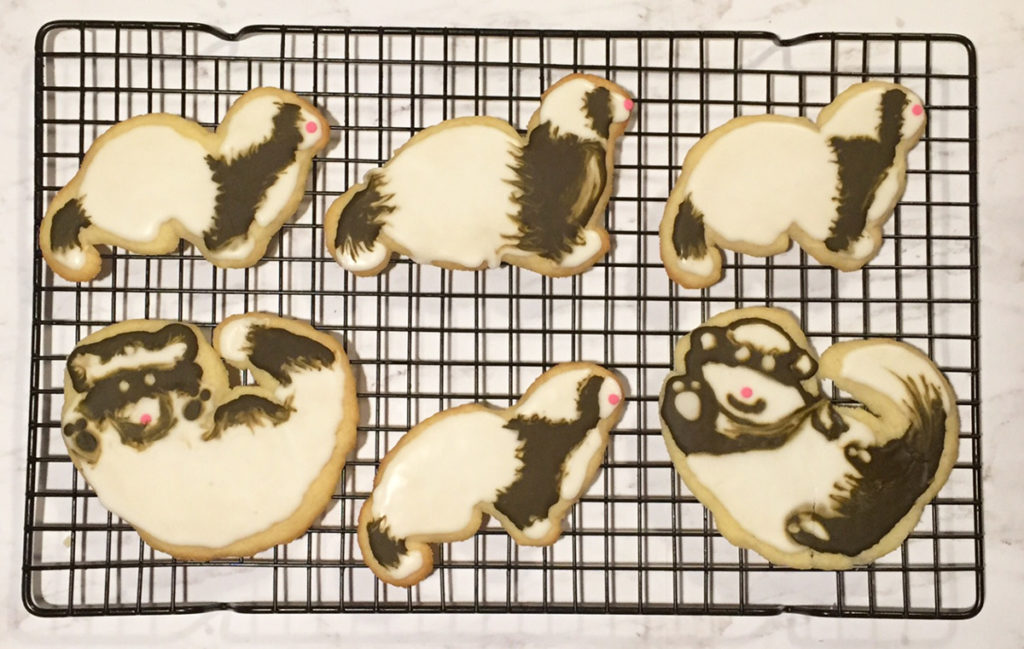
My coworker recently moved to New York, and since he loves his pet ferrets more than anything, I decided to create ferret shaped sugar cookies for him. While I have a box of 100 cookie cutters, there aren’t any ferret-like shapes in there. I also didn’t want to buy a custom cookie cutter shape that I was only going to use to make a dozen cookies. So I created my own cookie cutter shape using parchment paper.
Decide on the Shape
It may sound obvious, but the first step is to pick the shape of the cookie you’d like to make. It’s important to keep in mind that sugar cookies typically spread a little bit when they bake. So any super small details on the perimeter probably won’t show up in the baked cookie. For my ferret, I knew that its ears and tail would probably be the troublesome areas.
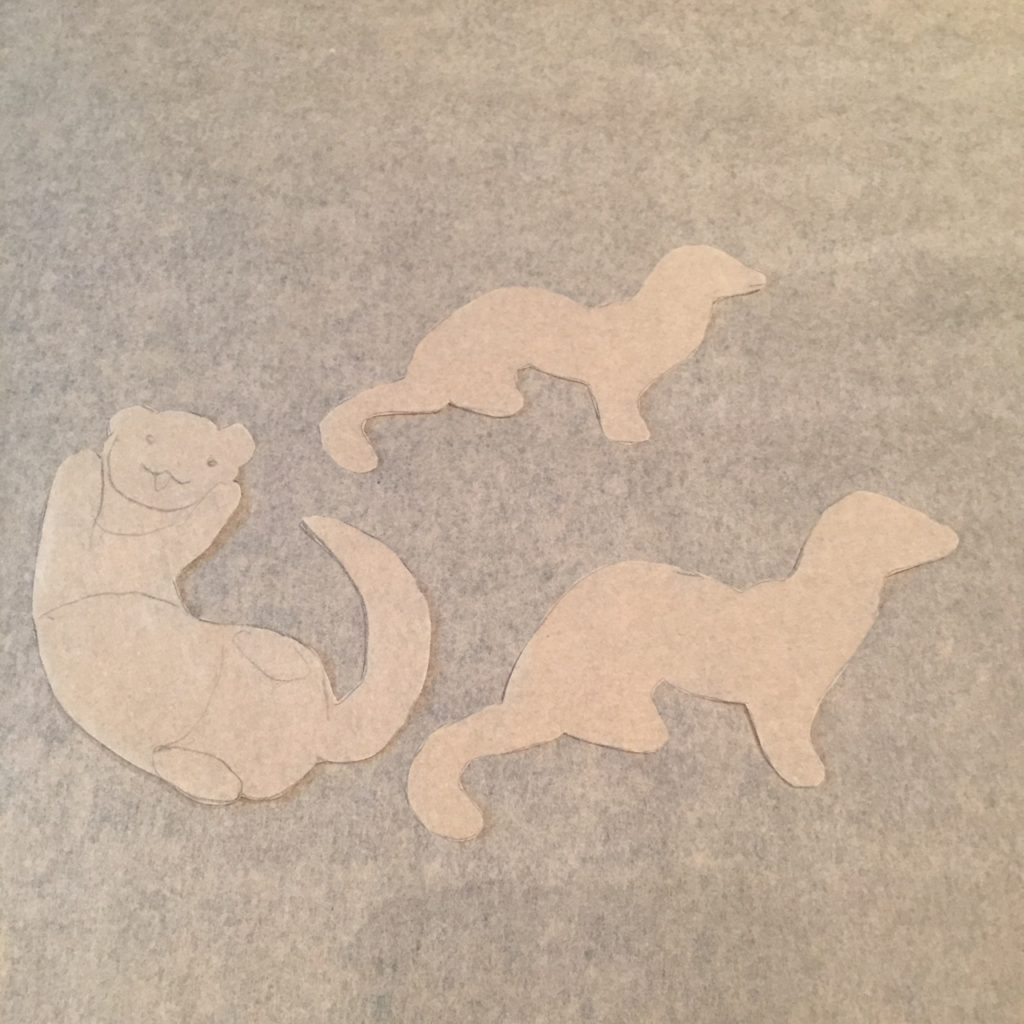
Search for images of the shape you’d like to make. In this case I searched for “ferret cartoon” because I didn’t want a realistic photograph of a ferret. It’s easier to mimic a simplified version of the shape you’re going to make into a cookie, like a cartoon or drawing. Then you can print the image(s) or just display them on your computer screen. If you’re not super comfortable free-hand drawing the shape, I’d recommend tracing the shape. You can take a piece of parchment paper and put it right up against your computer screen, then trace it lightly. Just be careful not to press too hard and damage your screen.
Pick the Size of the Cookie
I’d recommend sticking to a maximum of around 3-5 inches in any direction. You can also simply make it the same size of another cookie cutter you own and like.
I wasn’t sure exactly what size would work best for the cookie form of a ferret. It has to be big enough to easily cut the shape, but small enough that it’s a typical cookie size. You’ll see in the image below that I have two different sizes of the profile image of the ferret. I simply pressed CTRL and + at the same time to zoom in, and CTRL and – to zoom out. After tracing and cutting out both sizes, I baked a cookie in each size to see what worked best.
How Many Cookies are You Making?
If you are just making a batch or two of these cookies, you should be fine using plain old parchment paper for your cookie cutter shapes. Otherwise, if you are doing a lot of these cookies, I would recommend using a stiffer material like cardstock or notecards. Using a harder material like that will also make it less likely that you’ll cut or tear through your lovely shapes as you’re working.
Cookie Cutting
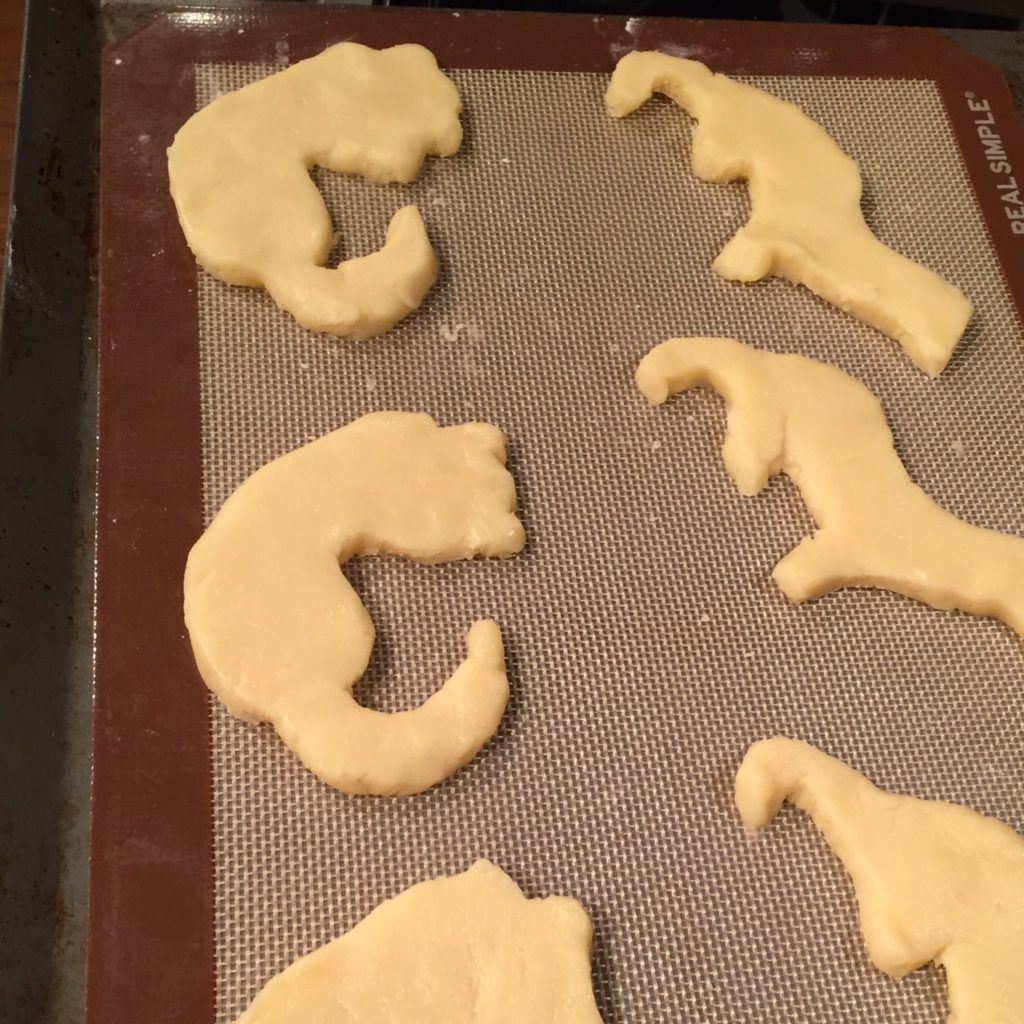
Now the fun part! Roll out your sugar cookie dough on a well floured surface. I typically like to use the William and Sonoma cookie recipe. Then place your parchment paper or cardstock template on top of the dough, and use a knife to trace out the shape.

Carefully place the cookies onto a sheet pan, leaving room for them to spread a little bit. Since my cookies were a bit on the larger size, I only put 6 on the tray at a time. Don’t be afraid to reshape the cookies a little bit on the pan if they get a little stretched during transport. Not that that’s every happened to me…
Tip: if your cookies spread too much after baking, I’d recommend putting your dough in the fridge until it cools down. When your butter is too hot before you put it into the oven, it can cause them to spread out more than you’d like.
Follow your recipe instructions to bake, cool, and frost your cookies. Here are my completed ferret cookies, complete with a pink sprinkle nose.
While it’s unlikely you’ll need to make ferret cookies anytime soon, I hope this article helps inspire you to create other custom cookie shapes. So let your creativity run free and let me know if you make anything fun!